

HTML4 provides plenty of tags that are helpful to make the webpage, but what are the features of HTML5 that make the life of a developer easier.
HTML5 brings powerful features such as semantic tags that make the HTML more meaningful to the browser and the web developers, video and audio elements to embed sound and video on the webpage, HTML5 API’s such drag and drop etc.
This article will try to explain most of them with examples and external resources.
HTML5 Brings The Sematic Elements For layout
In HTML4, when we have to make a section, we were using <div> element, which means we are making the division on the webpage, but the <div> element does not have the semantic meaning.
For example, the HTML code I have written to make a header section element with the <div> element. It would be hard to understand what <div> element represents on the webpage.
<!DOCTYPE html>
<html lang="en">
<head>
  <meta charset="UTF-8">
  <meta http-equiv="X-UA-Compatible" content="IE=edge">
  <meta name="viewport" content="width=device-width, initial-scale=1.0">
  <title>HTML5</title>
</head>
<body>
  <!-- I am using div element instead of header element -->
  <div>
    <a href="#">LOGO</a>
    <div>
      <ul>
        <li><a href="">Home</a></li>
        <li><a href="">Contact</a></li>
        <li><a href="">Blog</a></li>
      </ul>
    </div>
  </div>
</body>
</html>
HTML5 has introduced new semantic tags, which means these tags have their meaning, and the purpose of these tags is to make a nice presentation or a layout of the HTML web page.
You can see in the below diagram that HTML5 has made it very easy to make a layout that you can understand by reading the tags.
Note: I have written the CSS to style the elements so that I can display how they will look in the browser in a better way. I will provide you with the CSS at the bottom of this paragraph, but you can make these sections with only HTML5.
I have written the code to achieve this layout with HTML5 semantic elements, and you can see how they look in the browser.
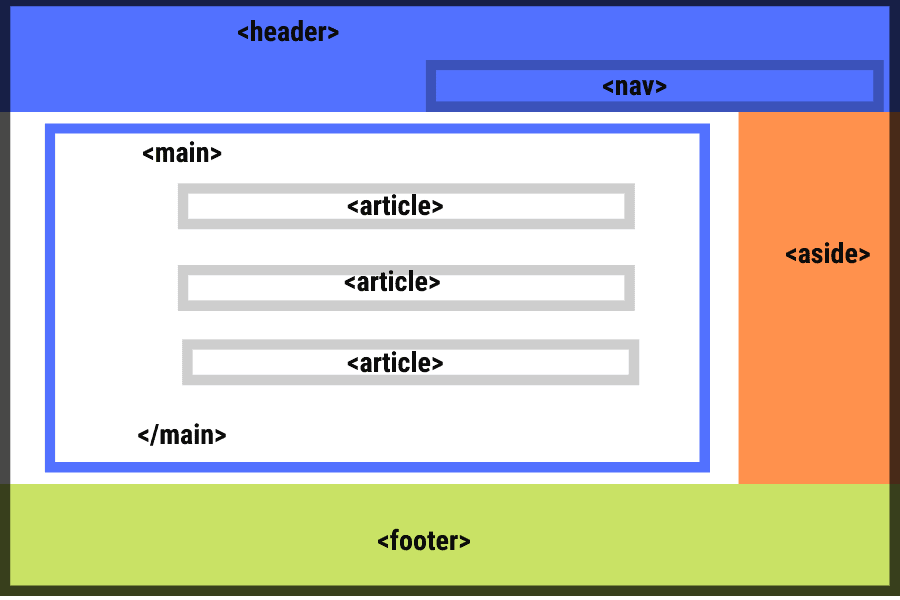
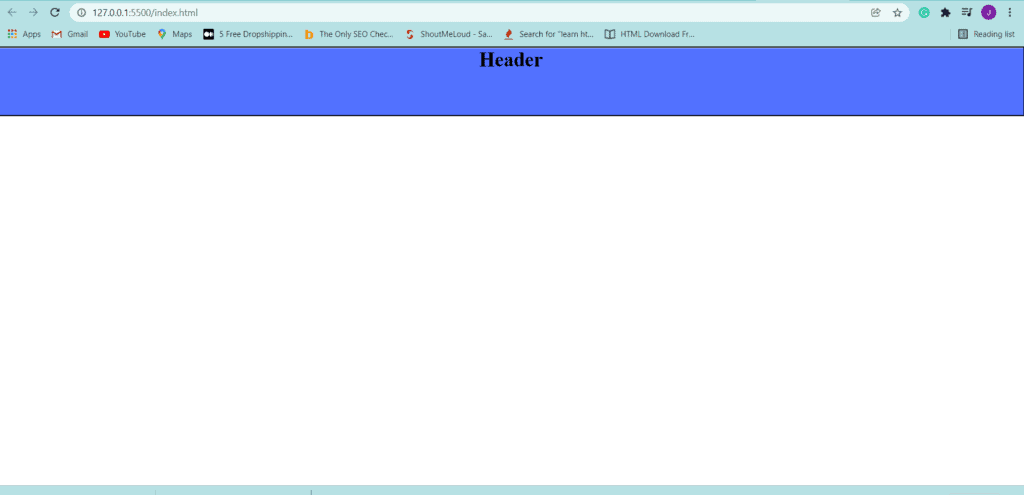
<header>:- The <header> element represents a HTML web page section where you can add a logo and menu bar. The <header> element will always be on the top of all the sections.
I have written the HTML code to make the same header section with the help of <header> sematic element that you can see in the diagram.
<!DOCTYPE html>
<html lang="en">
<head>
  <meta charset="UTF-8">
  <meta http-equiv="X-UA-Compatible" content="IE=edge">
  <meta name="viewport" content="width=device-width, initial-scale=1.0">
  <title>HTML5</title>
  <link rel="stylesheet" href="style.css">
</head>
<body>
  <!-- header -->
  <header>
    <h2>Header</h2>
  </header>
</body>
</html>
Output
You can see the header section in the image I have made with <header> element.
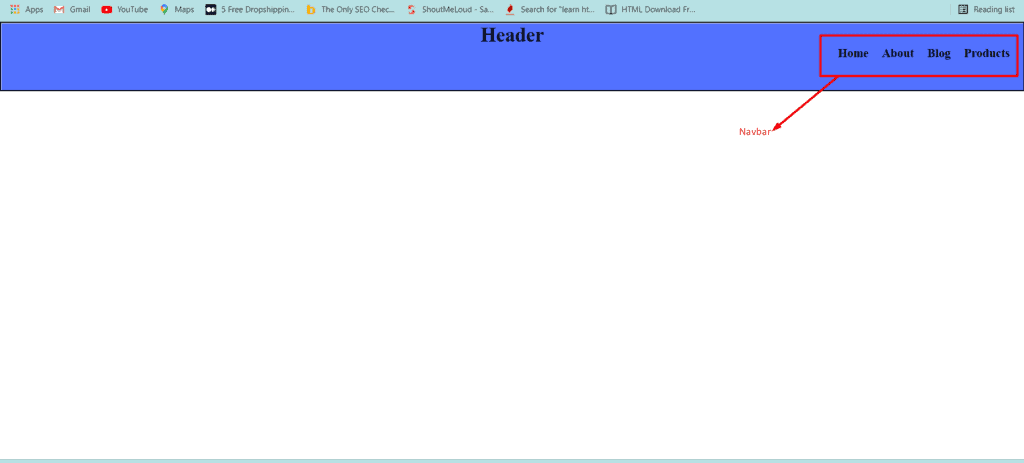
<nav>:- The <nav> element represents the menu of the webpage. It contains the navigation items which the user uses to navigate on the other section or pages on the webpage.
I have written the HTML code to make a nav bar with HTML5 <nav> element.
 <nav>
      <ul>
        <li><a href="#">Home</a></li>
        <li><a href="#">About</a></li>
        <li><a href="#">Blog</a></li>
        <li><a href="#">Products</a></li>
      </ul>
    </nav>
Output
You can see the navigation section in the below image, which I have made with <nav> element. I have highlighted the navbar with the red square.
<main>:- The <main> element in HTML5 works like a container for all the other sections which are representing the main content of the web page. The <main> element contains the <article> elements of the web page.
I have written HTML code to make the main section using <main> element on the webpage. I will not take the screenshot of the main element because it will be empty.
<body>
  <!-- header -->
  <header>
    <h2>Header</h2>
    <nav>
      <ul>
        <li><a href="#">Home</a></li>
        <li><a href="#">About</a></li>
        <li><a href="#">Blog</a></li>
        <li><a href="#">Products</a></li>
      </ul>
    </nav>
  </header>
  <main>
  </main>
</body> <article>:- The <article> element contains the content such as text, images that you want to show to the user on the webpage.
The <article> element normally starts with the heading(<h2>) element and also contains the paragraph(<p>) element. A webpage can have unlimited number of <article> element.
I have written the HTML code to make an article section using <article> element.
<main>
<article>
<h2>First Article</h2>
<p>This is the first article</p>
</article>
<article>
<h2>Second Article</h2>
<p>This is the second article</p>
</article>
<article>
<h2>Third Article</h2>
<p>This is the third article</p>
</article>
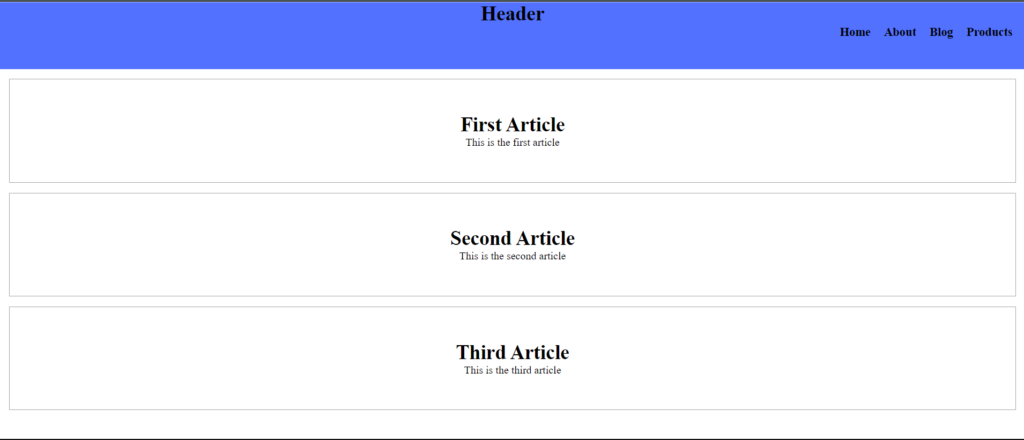
</main> Output
This is how the three <article> elements will look in the browser inside the <main> element.
<aside>:- The <aside> element contains the content which is in any way related to the main content of the webpage. It normally contains the other links to visit the sections on the same page or the other pages on the website. You can also use it to make a sidebar and display advertisements on the webpage.
I have written the HTML code to make an aside section using <aside> element.
 <aside>
    <h2>Latest articles</h2>
    <ul>
      <li><a href="#">Read this article</a></li>
      <li><a href="#">Read this article</a></li>
      <li><a href="#">Read this article</a></li>
    </ul>
  </aside>
Output
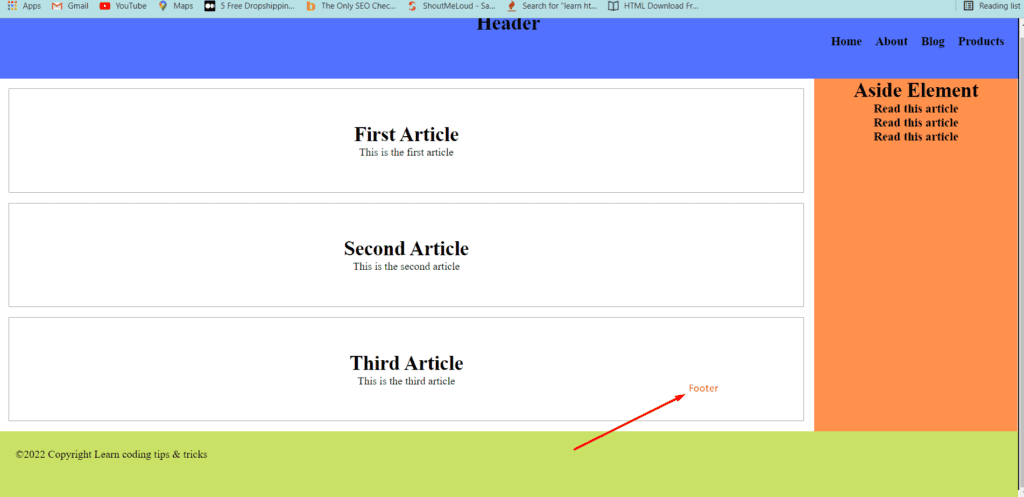
You can see in the below image how the aside section looks in the browser.

<footer>:- The &<footer> element represents the section where you can provide links to legal policies and Copywrite information about the website company. You can also provide navigation links in the <footer> element.
I have written the HTML code to make a footer section using <footer> element.
 <footer>
  <p>©2022 Copyright Learn coding tips & tricks</p>
 </footer>
Output
This is how a <footer> element will look in the browser.
Embed A Video And Audio with HTML5
The HTML5 makes it easy to play audio and video on the website. If you want to embed audio and video on the webpage, you can use <audio> and <video> elements.
<audio>: The <audio>; element embed a sound on the webpage. It contains the attributes to control the audio, such as play, pause and volume controls which brings a good user experience. It also includes the src attribute to tell the location of the audio file to the browser.
You can write content inside the <audio></audio> element to make a fallback if the browser does not support the element.
I have written the HTML code to embed an audio using <audio> element along with control and src attribute.
<audio controls
   src="https://easycodingtips.com/wp-content/uploads/2022/01/mixkit-simple-game-countdown-921.wav">
    Your browser does not support the <code>audio</code> element.
</audio>
Output
<video>: The <video> element also works the same as the <audio> element, but with the help of a <video> element you can embed a media player on the webpage.
The <video> element also comes with plenty of attributes but controls, height, loop mutes etc, which makes it a more powerful element. I recommend you to read this article to get the depth knowledge of <video> element attributes.
You can write the content inside the <video></video> to make it as a fallback if the browser does not support the element.
I have written the HTML code to embed a video using a <video> element.
<video controls width="250">
 <source src="https://easycodingtips.com/wp-content/uploads/2022/01/pexels-8871288_igKqoZxX.mp4" type="video/mp4">
 Sorry, your browser doesn't support embedded videos.
</video>
Output
Input Controls Are More Poweful With HTML5
HTML forms are used on the web pages to gather user information, and for that, you can use an <input> element, which uses the type to tell the browser what sort of information the user will provide.
HTML5 makes the form input controls more powerful by adding more options for the type attributes. This means it is far easier to collect the different sorts of data with HTML5 form types.
I will discuss some of the important <input> type attributes introduced in HTML5.
Input type Email:- HTML5 has made it easy to collect the user’s email by providing the email type attribute. You can even use attributes such as pattern to check whether an email is valid or not.
You can see in the below example I have written the HTML code to make an <input> element with the value of email to the type attribute.
<label for="email">Enter your email:</label>
<input type="email" id="email" pattern="[a-z0-9._%+-]+@[a-z0-9.-]+\.[a-z]{2,4}$" size="30" required>
Output
Input type range:- HTML5 has made another way to select the range with the <input> type range where a user can use a slider to give the input. You have to use the min and max attributes to provide the minimum value and maximum value a user can select.
You can see in the below example I have written the HTML code to make an <input> element with the value of range to the type attribute
<label for="carprice">Choose a maximum price of the car: </label>
<input type="range" name="carprice" id="carprice" min="5000" max="50000" step="100" value="2000">
Output
input type color:- There is one more <input> type control that is color type which gives the user an option to choose the color from a color picker window that opens when a user clicks on that.
In the below example, I have given the value of color to the type attribute of the <input> element to make a color picker.
<input type="color" name="color" id="color">
Output
You Can Draw With The HTML5 <canvas> Element
HTML5 brings a new element known as <canvas>, which is a kind of square space to make or draw anything. The <canvas> element helps a web developer make different shapes such as rectangles, squares, etc.
Moreover, the <canvas> element even helps a user draw anything with a mouse’s help. The <canvas> element is always empty, and to see it in the browser, you have to style it.
If you want to make a <canvas> element interactive, you need to use javascript and style it with CSS
For example, I have written an HTML code to make a <canvas> element.
<body>
  <canvas>
  </canvas>
</body>
I have used a codepen to write the code to make it more practical for the demo.
Codepen demo
See the Pen HTML canvas element by Jaspal (@jaspal9755) on CodePen.
If you want to deep dive into the <canvas> element you can watch this video.
Local Storage And Session Storage With HTML5
You know that it was extremely hard to store some sort of data in the browser, and you were getting a space in kb’s to store data with cookies.
HTML5 makes it possible to store the data in the browser without using cookies, and you can get more space for data storage. Moreover, with the local storage, if you shut down your browser, still you can access that stored information.
On the other hand, the session storage is used to store the data for that particular session, and this means once you turn off the session, the stored data will no longer exist in the browser.
HTML5 local storage helps create small applications where you do not need to use disk space from another server. You can use your browser space.
To use the browser storage, you need to use the <input> element to grab the user information, and you need to use Javascript to make it functional.
I recommend you to watch this youtube video to learn how to make local storage with HTML and Javascript.
Know The User Location By HTML Gelocation API
HTML5 makes it possible to know the user’s geographical location by using geolocation API. When you installed an application on your computer or mobile, you have seen that it asks a prompt question that you want to share your location.
The location is used by web application companies to send the information to the users according to that user’s interests in that location.
The HTML5 Geolocation API uses the longitude, altitude and a few more senses to grab the location.
I recommend you to read this article on geolocation API.
If you would like to learn how to use the API, watch this video.
Drag And Drop With HTML5 API
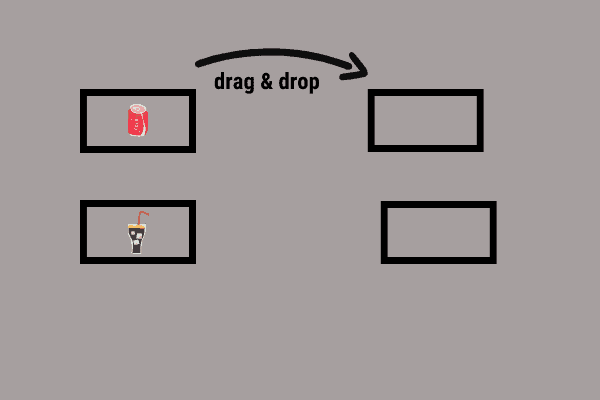
The drag and drop HTML5 API is used to make an application where a user can drag an element on the screen and drop it on the other location. Basically, it increases the interactivity of the web application user in a better way.
This HTML5 API uses the drag events such as drag, dragenter, dragover, dragleave and many more to perform the activity of drag and drop an object.
The interfaces which are used by the HTML5 API are DragEvent, DataTransfer, DataTransferItem and DataTransferItemList.
You can read more about HTML5 drag and drop API by reading this article.
